¶ Edit Estimate
The edit estimate page provides you with details about the Estimate and breaks it up into the foilowing sections
- Vechile Details: Contains owner and vechicle make and specifics related. It also contains Insurance related details and Rates depending on the Estimate Methodology your using.
- Notes: Is a place to add arbitary notes relating to the estimate. This can be handy to use when writting addtional notes taken about the customer or damage that needs to be factored into the estimate.
- Est-Items List: This displays the vehicle body menus to use that will add times to your quotes depending on the section where the damage area is and wether your estimating on Funny time or NTAR / LTAR time.
- Supp-items List: this is hidden dynamic section that only appears if you are creating a single or multiple supplements with the esitmate so that you can quckly tell if supplements are or were incldued.
- Images: This area allows you store the photos that you will use in creating your esitmates of supplements.
- Files: This area allows you store PDF files like supplier Part quotes, Repair Procedures, Manufacturer position statements and any other type of PDF.
- Activity: This provides a log of the various changes being made in Status, Emails in and out, SMS messages in and out, information pushed out to other System like insurer claims management systems.
¶ Vehicle Details
This section is intended to hold a lot of the key owner, vehicle and insurance details needed for an estimate. there are also some built in smarts built into this page to make some repetitive tasks quick with a little bit of prior setup.
¶ Vehicle Owner
The Vechile Owner informaitn displays what orginated from the creation of the Card so its like for like. More then one contact number can be stored with Contact Number 1being an important one used with Send to customer SMS Txt features. Making it the one where you want to add a mobile phone number. This phone number is also the one that will appear in your printed Estimate and Invoice if for Insurance work. As the Name is linked to the CARD, if you do need to edit the Vehicle Owners name then go to the card to edit it.
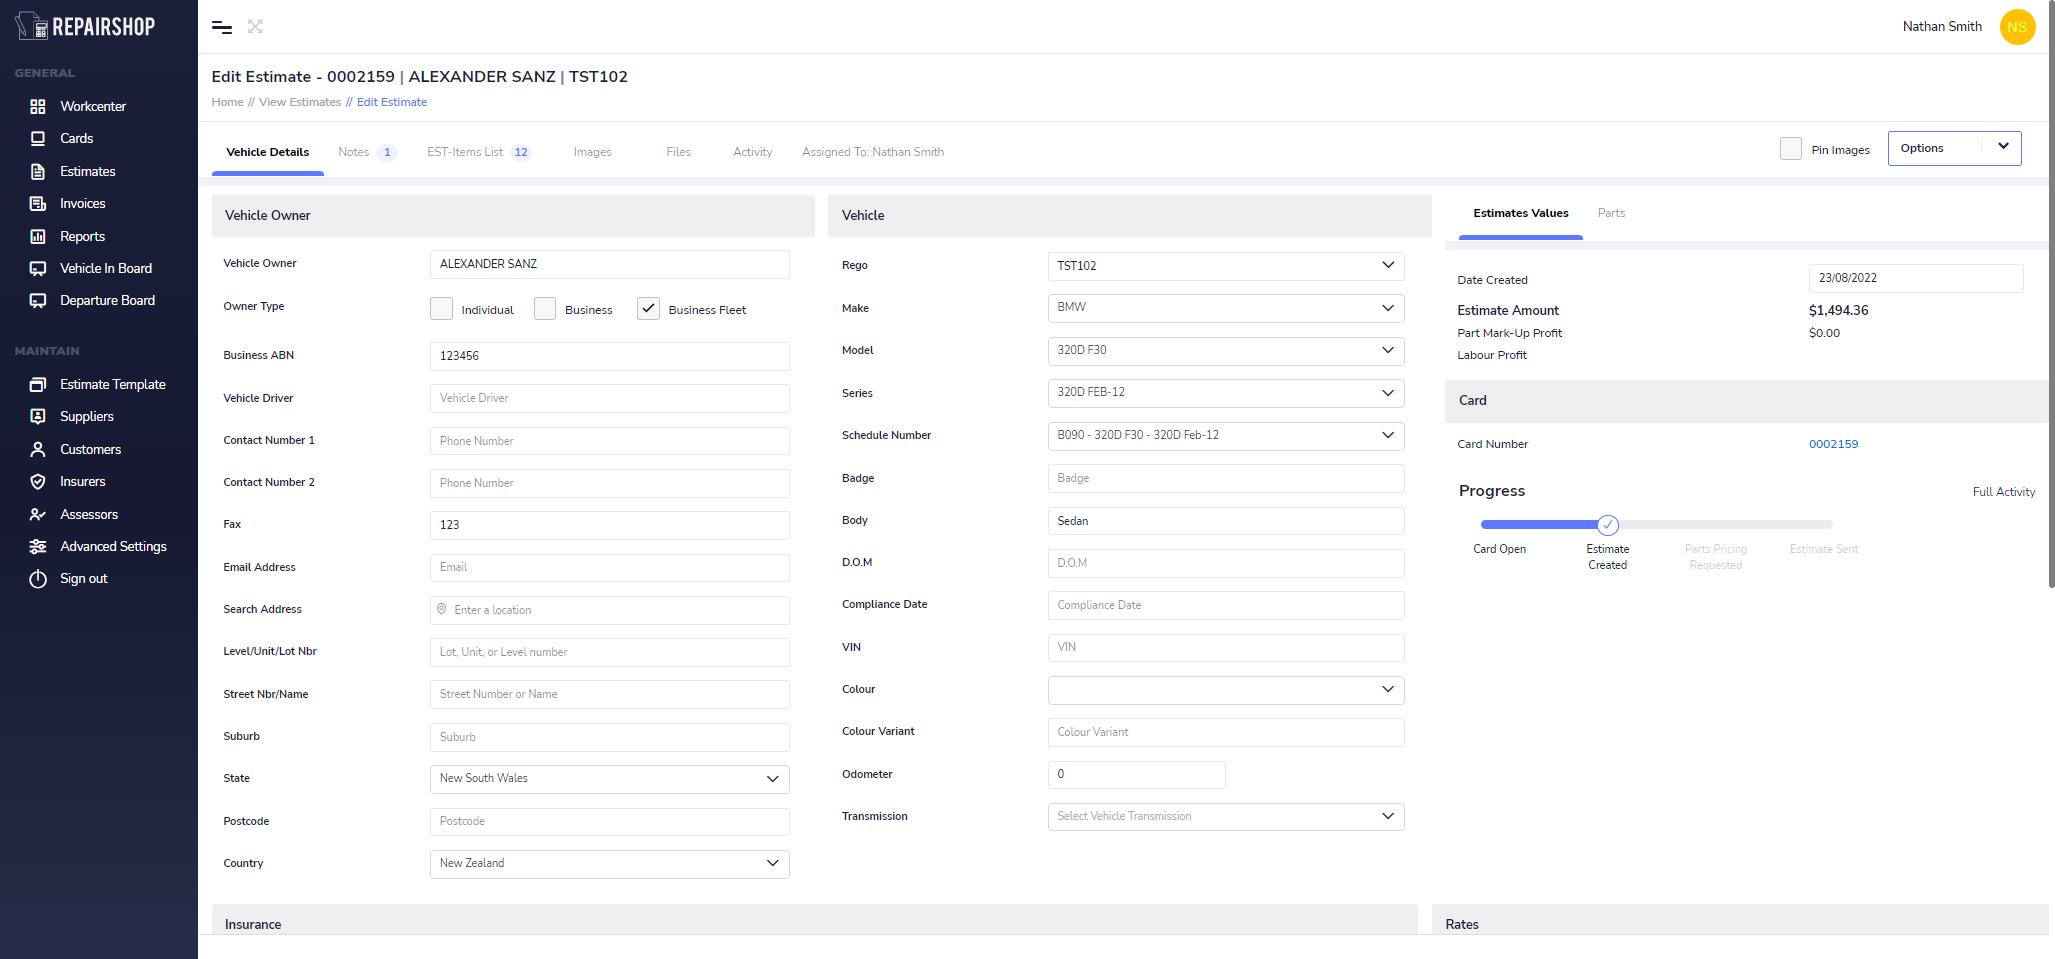
¶ Vehicle
The vehicle secton has some smarts bult-in to speed up estimate details. If your customer is a repeat customer, the list of previous vehicles that you have quoted for appear int he drop first to select unless its a new vehicle. This works the best when you Business or Fleet customers. When you select a previous vehicle all it Make model and Schduled number information are populated in the fields below to save you time.
Rego to VIN lookup: Repair-shop come with the abililty to provide a REGO to VIN lookup to make the job a bit faster also (optional extra at 60c per lookup)
NTAR /LTAR scedules: We update the system to have the latest IAG schduled times for use with your estimates.
¶ Insurance
The insurance section also has some smarts to save on time with repetitive data entry.
Deciding what to set in the Insurace Repair Job
- Yes = an estimate to be written on vehicle repair which will be sent to an Insurance company for assessment and an authority to repair
- No = an esitmate to be written on vehicle repair that is for a private job
- Other = an estimate to be wrtten where no vehicle is involved and a provate job. Select this so that the esitmate doesnt require a Rego and other infromation that the system normally checks with insurance or non insurance work.
The Insurer name field list insurers list you manage in your account (See our Insurance Management page for more information) and lets you add new ones quickly for you to setup in more detail later.
The Assessor Name field lists Assessors you manage in your account (See our Assessor management page for more information), when selecting one the asessors from the list it populates their email, and phone numbers to save on time with data entry and for a quick lookup when you need to call them. The field also lets you create new ones quickly for you setup in more detail later
Excess can be recorded and also can be set to NIL excess for when you have a situation whereby no excess needs to be collected on an estimate.
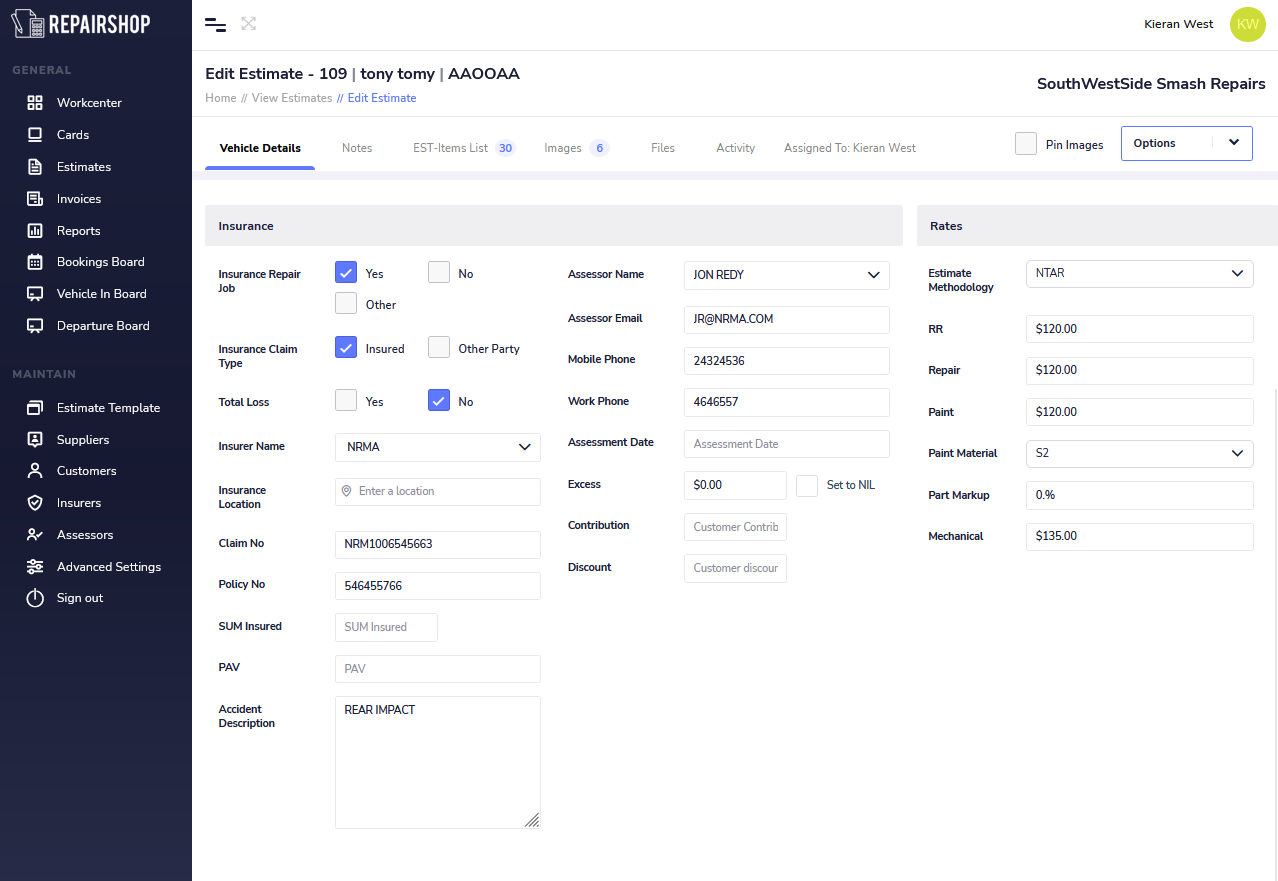
¶ Rates
The Rates area has some time saving features in it also. If your esitmate is for repeat work from an insurer whereby you have previously setup hourly $$ rates on RR, Repair, Paint and Paint Material types then this section will auto populate with those rates saving you time in data entry. (See section Managing Insurers for more informatin).
You can also add this in manually each time based on the estimate methodology you will choose to write the esitmate in.
Check out our How to create an Estimate with NTAR / LTAR times and How to Create an Estimate with Funny time to get an idea on how this fields are designed to work to save you time on data entry.
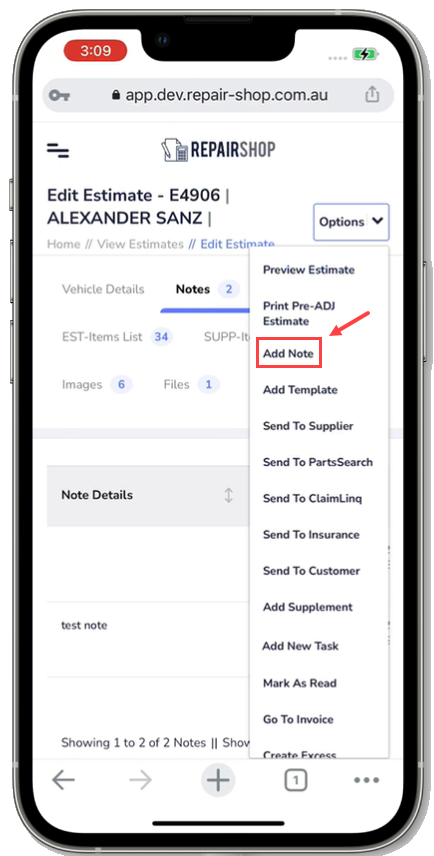
¶ Notes
Notes lets you add information, from general to detailed about the card. The number of notes written will appear next to ‘’Notes’’.
NOTE: To make sure your new note or edited note appears, press the ‘’Save Note’’.
Below shows how notes are added, edited and deleted on a computer.

¶ Below shows how “Add Note” appears on a mobile device.
¶ EST – Items List
This section has some dynmamically available actions that can be performed during the course of writing an estimate depending on the Estimate Methodology chosen.
So that you can see how this works when writing an esitmate please see the following videos
How to create an Estimate with NTAR / LTAR times
How to create an Estimate with Funny time
¶ Supp-Items-List
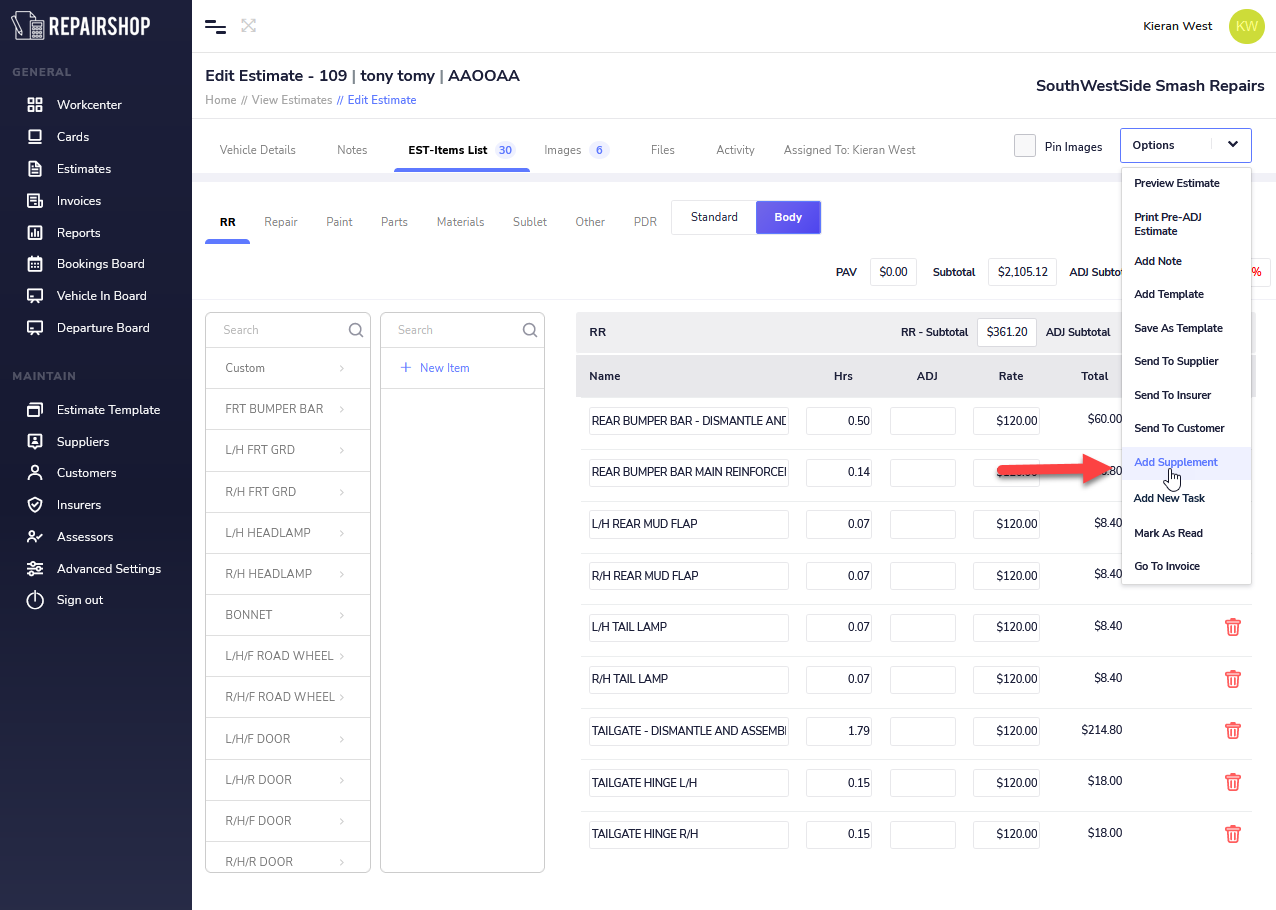
The Supp-Items-list is a dynamically visible tab that will appear only when you have to create a supplement.
To create a supplement click on Options > Add Supplement
The new Supplement now appears ready for you to start estimating. This supplement is now also linked to the primary Estimate.
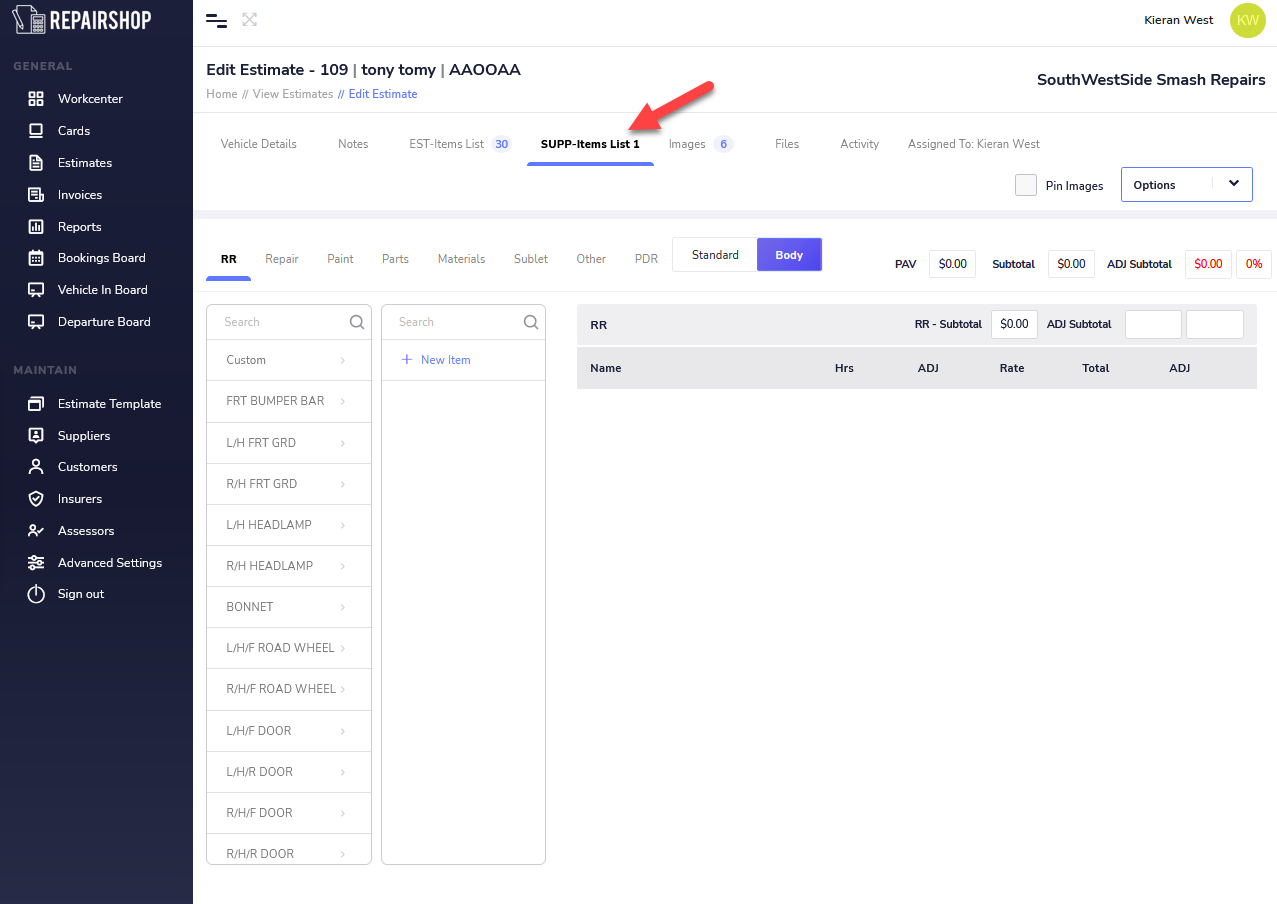
You can create multiple supplements linked to this primary estimate.

¶ Images / Pin Images
With images you’re able to add on or many images of the vehicle to the card at the same time.
¶ Drag and Drop
By dragging and dropping these images from your PC they can then be sorted into the categories; “Existing Damage”, “Accident Damage” and “Supplementary Damage”.
NOTE: To add and organize images use drag and drop.
¶ Browse Images
To upload images by browsing to a folder on your PC, click on the “Browse Images” button which then opens file explorer on your PC and navigate to the folder where the images are kept.
This video shows you how to manage Images in Estimates.
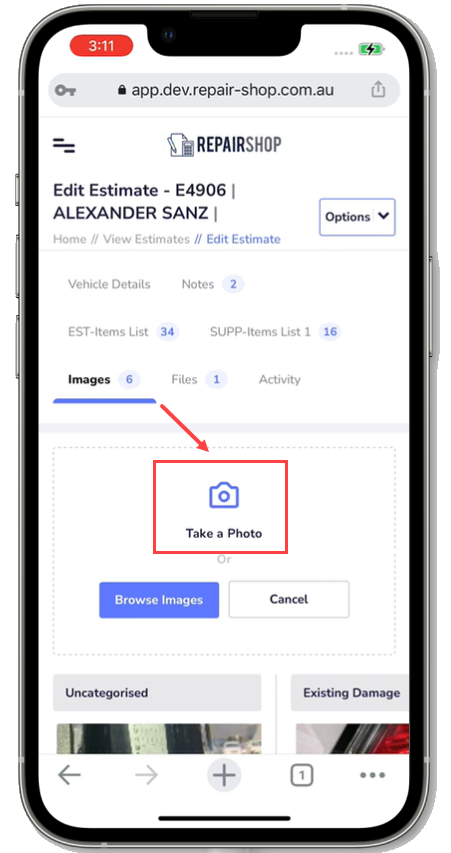
¶ Images from a Mobile Device
You’re able to take a photo straight away by pressing the “Take a Photo” icon.
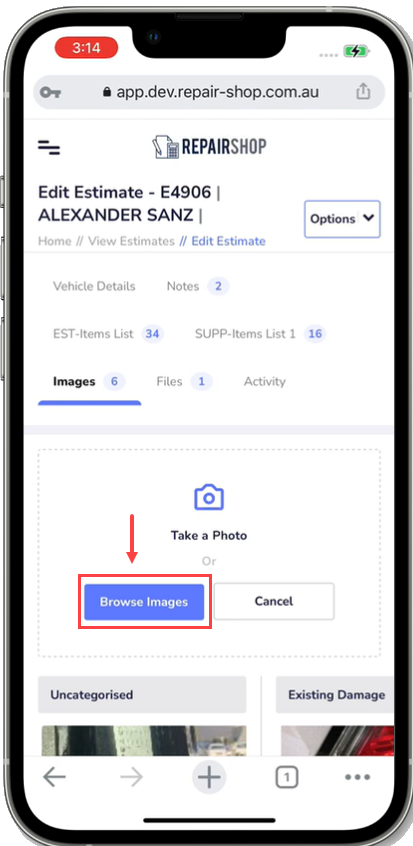
You can also click “Browse Images”, this will go into your camera roll and you’re able to select photos that have already been taken from there.
¶ Pin Images
Next to Options is Pin Images. There is a Pin Images tick box, this allows you to see the images uploaded from the file on the left side of the screen.
¶ Files
In files you're able to drag and drop or browse files that you want to upload. It shows you the:
- File Name
- Who it was uploaded by
- The date it was uploaded
- File size
- Action
You can delete a file by clicking on the red bin icon.
This video shows you how to manage Files in Estimates
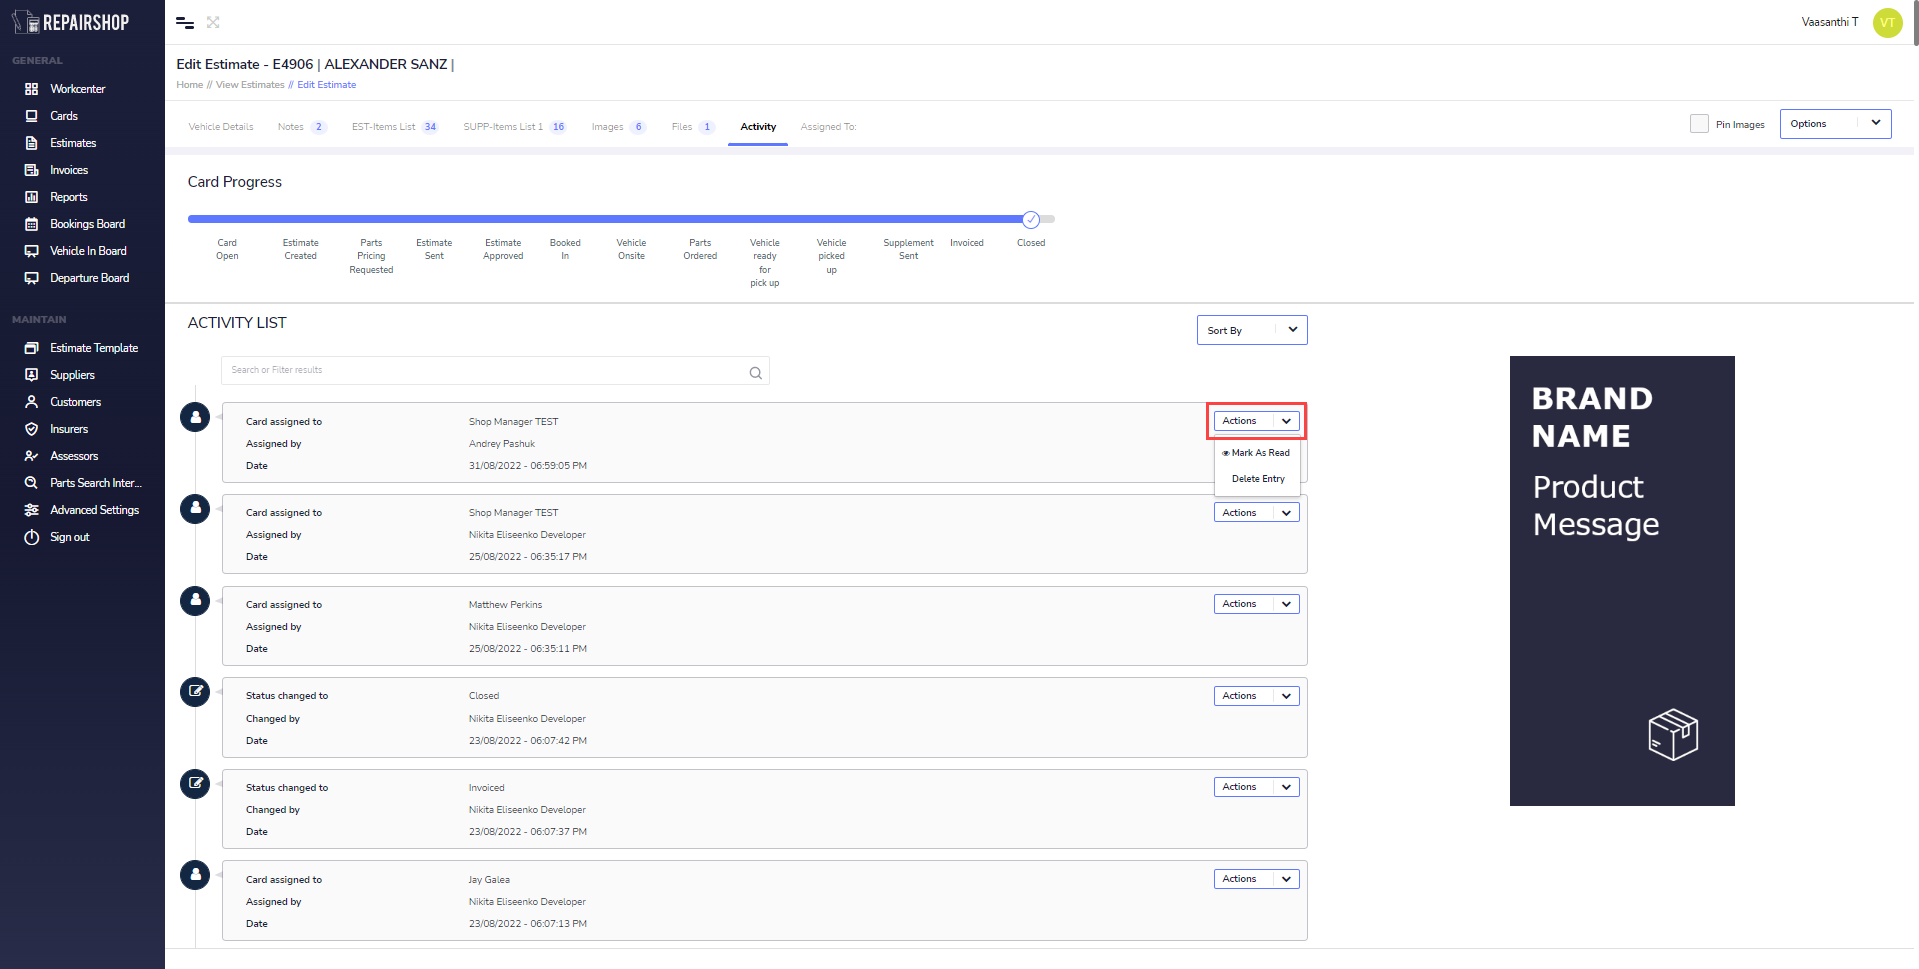
¶ Activity
The activity list section is like a running log of all the changes that are being made to the Estimate during its progression. You will find a log on emails being sent out, confirmation of changes coming in from External systems like ORM, Estimage and more, changes in the assignment of the card or estimate from one user to another and status changes that occur as the Estimate progress through the repair management workflow.
The activity log takes the Date and Time of each action taken in Real time automatically so that when you or another person comes back to it, there is an history of the steps taken with the Estimate.

¶ Card Progress

With card progress you can change the stage of where the card is.
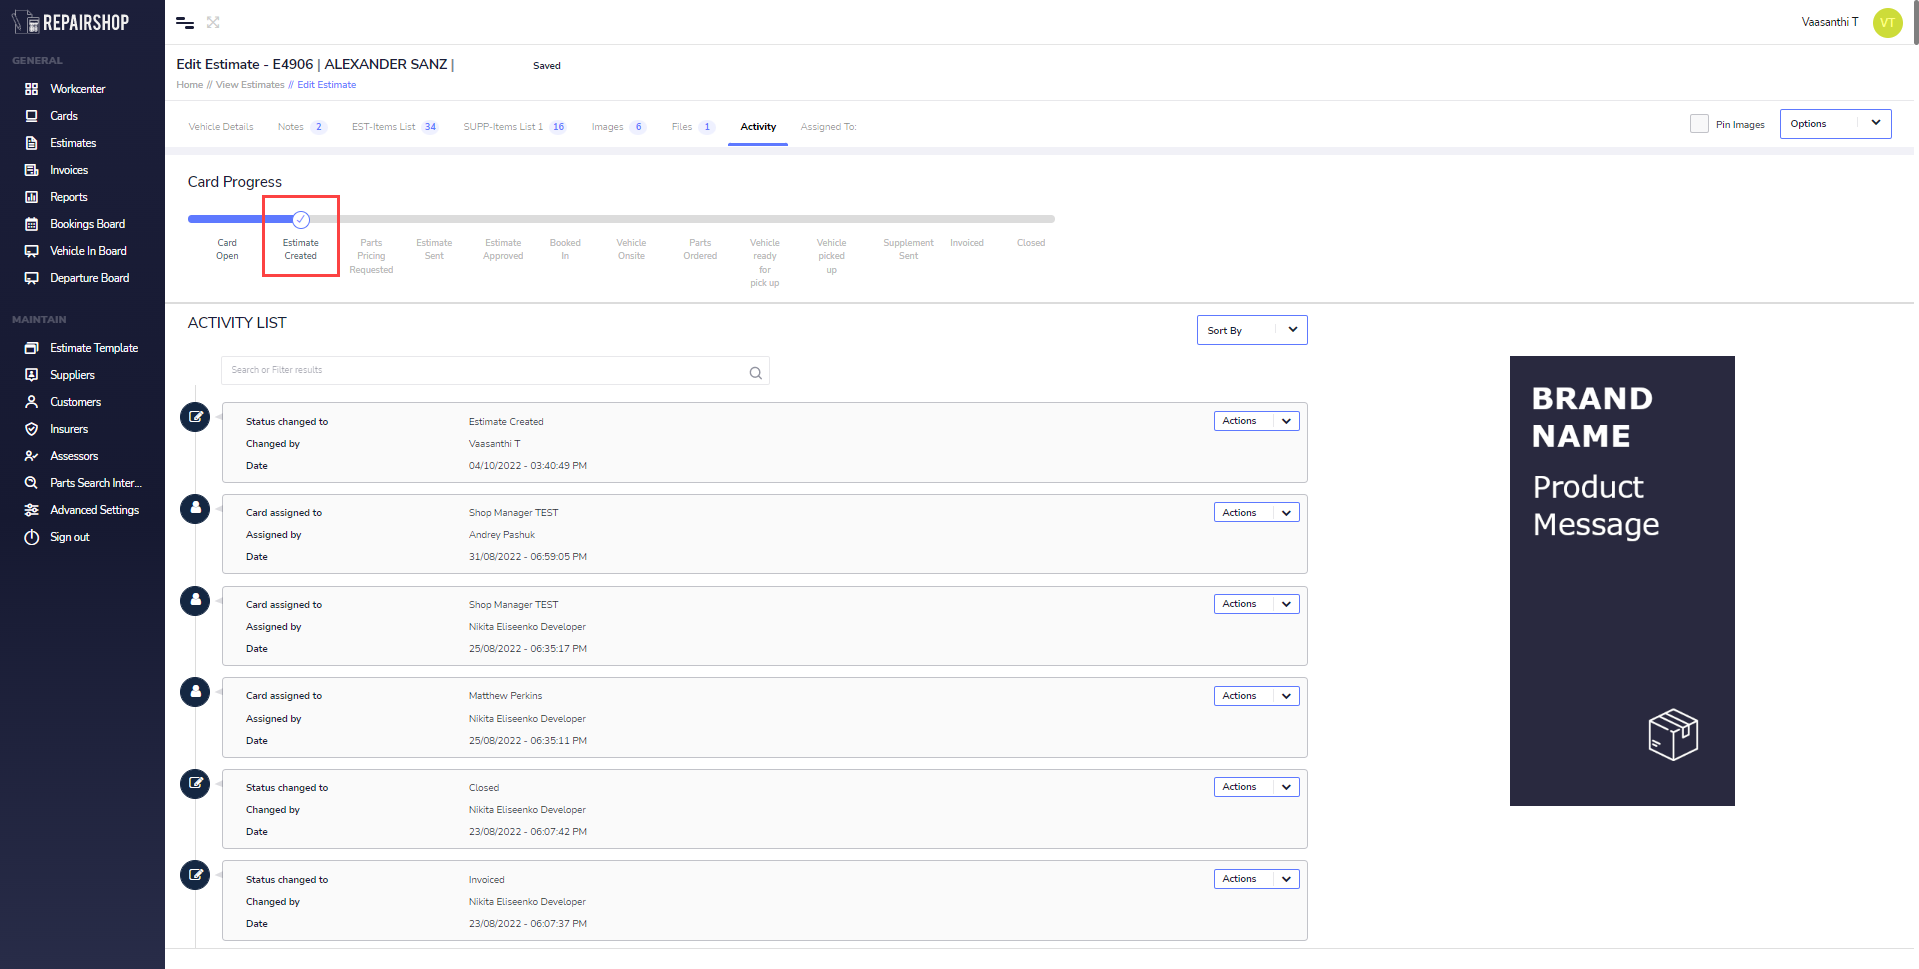
This will then appear in the Activity List.
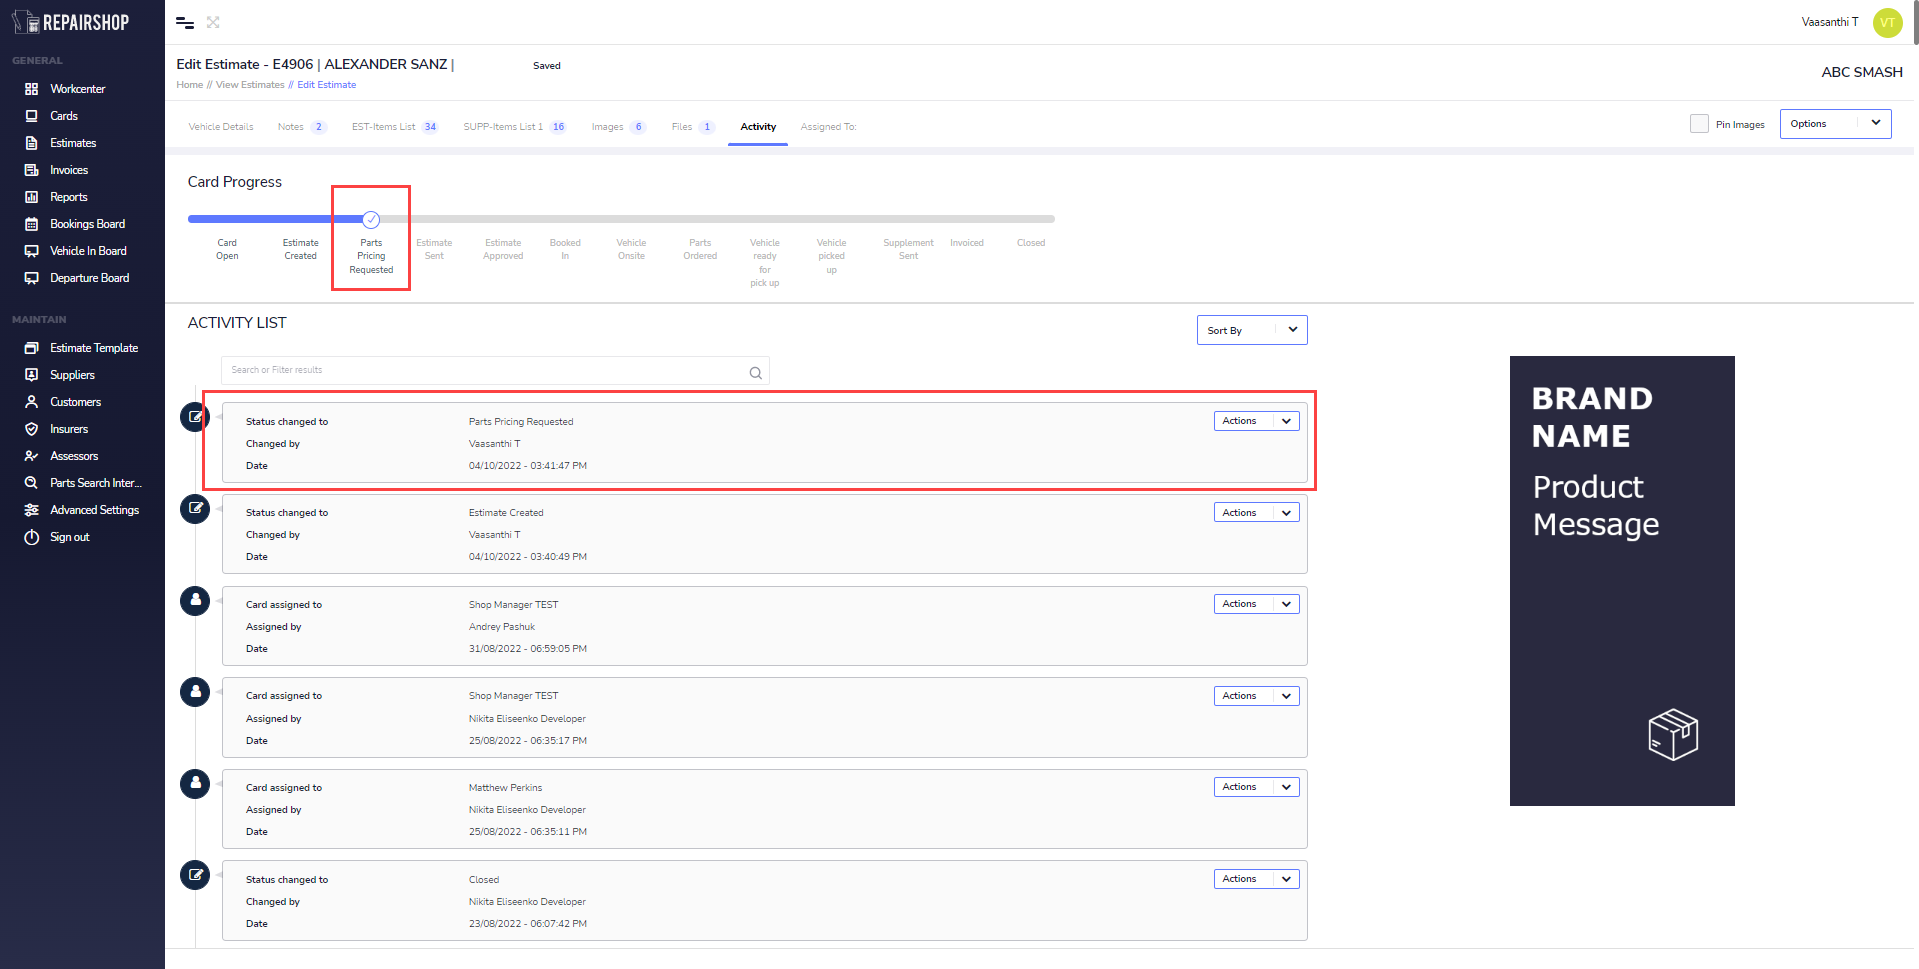
¶ Activity List
Activity List allows you to see the cards changes and progress from start to finish.

You can sort by which activities you'd like to see under the sort by tab.
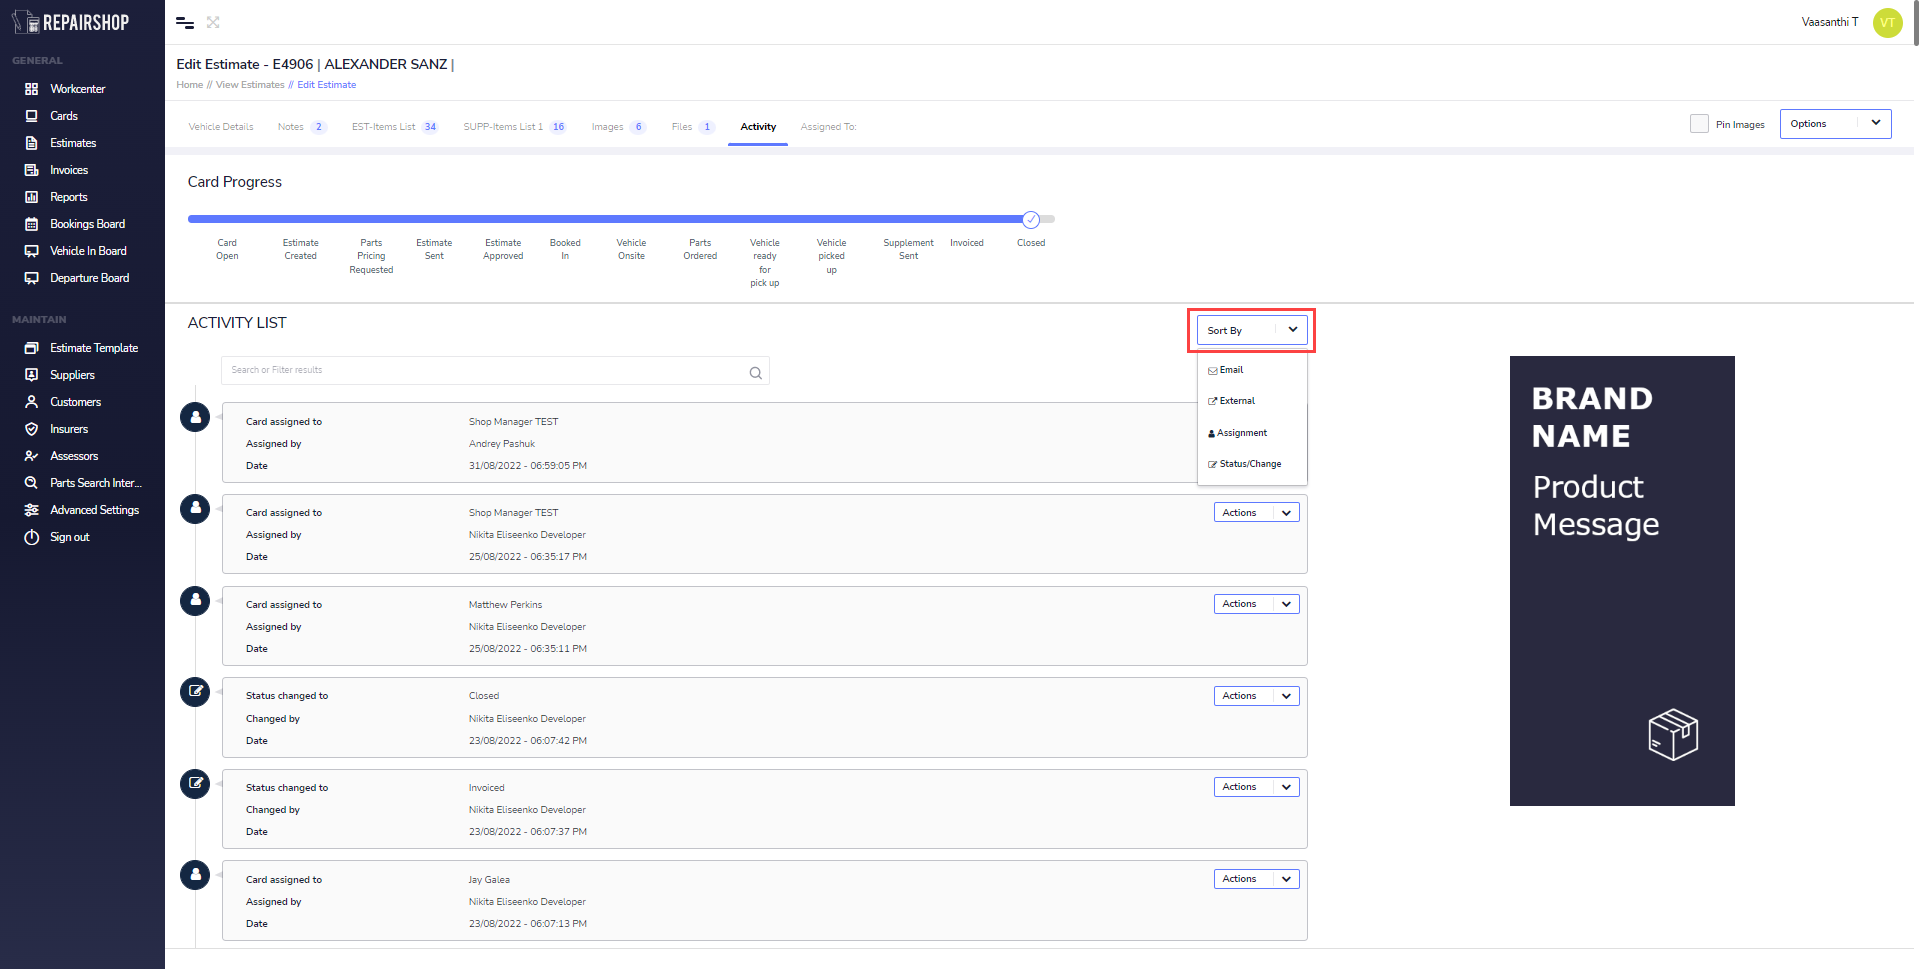
The activity actions are mark as read or delete entry. Mark as read allows you to Delete entry allows you to delete the activity selected.